Operation
Display Screen
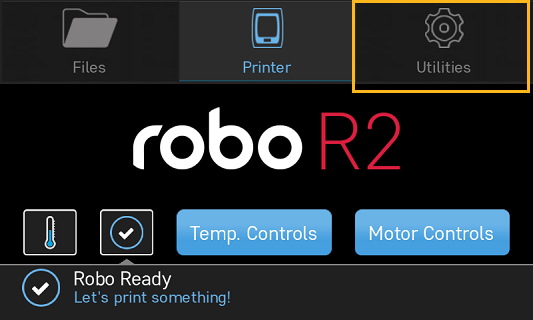
The color touch screen display on the front of your Robo R2 is the main access point for setting up, controlling, and reviewing all components of your 3d printer. You can navigate through the menus by touch or a stylus.
- Files
- -Here you are able to navigate through your files, whether they are on a usb thumb drive or on the local hard drive internally.
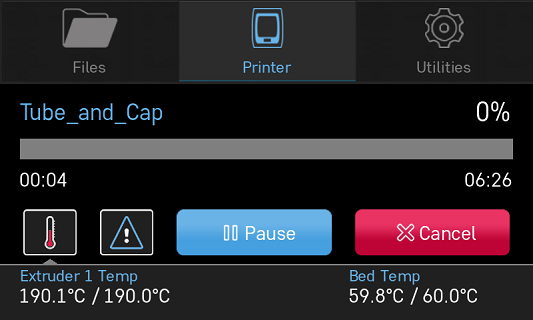
- Printer
- -The print screen is the default screen when printing. This will show you file printing, temperatures, a progress indicator, error messages, and pause and cancel buttons while in use.
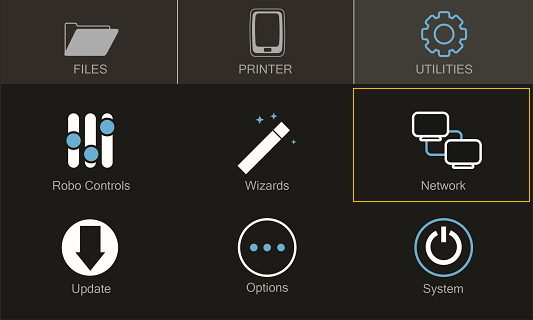
- Utilities
- -The Utilities menu offers a variety of options including: fan controls, z-offset wizard, network settings, and a way to update your printer.
Setting the Z offset
Here we will calibrate Robo R2 by setting the Z-Offset and making sure your first layer is applied correctly. We will be covering three ways of zeroing in on your Offset. The first is the Z-Offset Wizard found in Utilities> Wizards; the second is the Fine Tune Wizard, also under Utilities> Wizards; the final is manually adjusting your Offset in the EEPROM manager.
What is “Z-Offset”? Simply, its the distance between your nozzle and your print bed when the print bed is at home (bottom of printer), which is technically known as a Home Offset. This offset can change by adjusting the bed springs, not seating your print bed correctly, or even a shifting hotend.
Z-Offset Wizard
Select UTILITIES on the touch screen. Then select WIZARDS from the list. From here you’ll select Z OFFSET WIZARD. Now, the printer will wait to calibrate its home position.

Follow the directions on the screen by using the calibration card or a standard sheet of paper. Press on the ‘Up’ arrow to raise the bed up toward the nozzle of the printer. Slide the calibration card in between the nozzle and bed and continue pressing the ‘Up” button until you feel little resistance on the card between the Nozzle and the print bed. Note: You still want to be able to slide the calibration card back and forth but with enough resistance that it is touching both the bed and the nozzle.
If your bed is too high and the calibration card does not have enough room to slide between the nozzle and the bed, press the down arrow until the calibration card can pass freely but with a slight resistance between the nozzle and the bed.

Fine Tune Wizard
If you are experiencing the nozzle dragging (too low) or your prints are not sticking (too high), you can fine-tune your Z-Offset. It’s a little more work, but you will tune your offset by actually printing on the bed to get the perfect height. Your Robo R2 will print a series of vertical lines, one at a time. Between each pass you can increase or decrease the Z-Offset value as needed. To use the fine-tune offset wizard, follow these steps below:
Note: It is very important to make sure that the print bed is level by adjusting the thumb screws below the print bed before starting this wizard.
- To start, select ‘Utilities’ from the home screen, then select ‘Fine tune offset’. Select the material currently loaded in the printer. Then the wizard will ask you which corner you’d like to start from. This simply sets where the printer will start printing out the test lines. You can start from whichever corner you prefer.
- Once the printer homes and positions itself to begin testing, you will see a visual reference on the screen to help you know what to look for in order to find an ideal Z-Offset value.
- You will come to the “Adjust Offset” screen, where you can set the adjustment increment, move the bed up or down, and test the offset. We recommend testing the offset first so you can get a visual reference to fine tune the current offset. Move the bed up and down with the provided buttons on screen, and test with the ‘test offset’ button to see if it looks satisfactory.
- When you’ve found a satisfactory Z-Offset value, press the forward arrow in the top right corner and select ‘Save’ to finish the wizard.
Manually setting Offset in EEPROM Manager
If you are a printing veteran and are comfortable with manually setting your Offset, you can do so under Utilities> Options> EEPROM> Home Offset. In the “Z” screen you will see the value of your current Offset, as well as two arrows that will increase or decrease this value. The arrows are arranged so that they correspond with raising or lowering the bed. A smaller value brings the bed closer to the nozzle, while a larger value increases the distance away.
If your Offset seems close but prints are still not sticking, you can decrease the value by 0.1mm - 0.2mm and try again. Generally only small changes may be needed.
Loading and Unloading Filament
Loading filament
Now, unhinge the spool holder by simply pushing on the top of the higher lever from the rear of the printer. Next, insert the filament feed tube into the filament sensor block.
To begin loading filament, hang your filament spool on the top spool holder. Be sure to unroll at least 11”— or 30 centimeters — of filament and cut the tip with a pair of scissors. Thread it through the base of the filament sensor block and into the filament feed tube.

Now select UTILITIES on the touch screen. Then select WIZARDS from the list. Finally, select FILAMENT LOADING WIZARD. The on-screen prompts should guide you to loading your filament.

Continue feeding the filament through the filament feed tube until it reaches the extruder. Then, press the extruder lever arm and feed the filament into the printer’s gears.
The filament drive gear should push the filament down, into the nozzle, and out the other end. Once you see this, press NEXT on the screen, then press DONE.
Unloading Filament
- From the home screen select ‘Utilities’
- Next, select ‘Wizards’
- Select ‘Filament Change Wizard’
- After you printer heats up, the feeder gear will start to retract the filament from the nozzle
- Once you see filament coming out of the top of the extruder, select ‘Next’ and ‘Finished’
Start a print
Starting a print from your internal storage
To create your print Select FILES on the home screen. Then select a file to print from the list. Now, select START to print—and be sure to wait several seconds while Robo R2 prepares to print the file.
Note; that you can select PAUSE to pause your print, or you can select CANCEL to cancel your print.
Note; you can change the nozzle temperature by pressing on the extruder and adding in your desired temperature
- Starting a print from a USB flash drive
- Insert the USB flash drive into the USB slot on the front of the printer
- Select ‘Files’ from the home screen
- Select the USB folder that will appear at the top of the list
- Select which file you would like to print
- Next, you can choose whether or not you would like to download the file directly to the printer or print directly from the USB
- Finally, select ‘Start’ to start the print
Print Status
There are three ways to check on the status of your print while your Robo R2 is at work printing away
- Screen
- While your Robo C2 is printing, you can simply check the status by selecting ‘Printer’ on the home screen. This will indicate the name of the file printing, what percentage done your print is, a progress indicator, along with the nozzle temperature and any error messages you may have encountered.
- Robo 3D App
- If you have the Robo 3D app, you can check on the status of your print by selecting the printer under the ‘Dashboard’ tab This will indicate the name of the file printing, what percentage done your print is, along with the nozzle temperature

- Web app
- If you have a web browser on your computer or mobile device, you can check on the status of your print by navigating to its IP address in the navigation bar of the browser
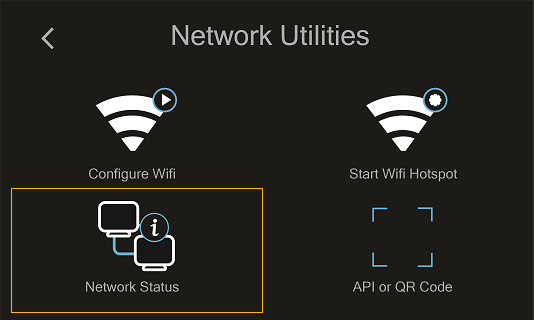
- To see the IP address of your printer, select ‘Utilities’ from the home screen
- Next select ‘Network’
- Then select ‘Network Status’ and note the IP address of your Robo C2
- Copy that number into your browser navigation bar, and it will bring you to a web app to see all things with your Robo R2
Using print bed adhesion
- The Robo R2 has a print bed adhesion PEI plate already installed with your printer. These will usually last about 4-6 months depending on use.
- In order to make sure you get good adhesion of your print, make sure to wipe the print bed adhesion with a damp cloth before every print.
- If your prints have a hard time sticking to the bed, you can use a method to roughen the surface by using a 2000 grit sand paper and lightly sanding the top surface then cleaning off with a damp cloth.
Removing the print
When the print is complete and cooled down, carefully remove the print bed with both hands and set on a flat surface. Use the provided spatula to carefully remove the print at its borders. Then, slowly work your way underneath the print until it’s loose. Don’t force the print loose by pulling it up directly up from the print bed, since this may cause your print to break.
Setting Up Wifi
To begin connecting to your Wi-Fi network, Select UTILITIES on home screen. Select NETWORK. Select CONFIGURE WIFI. Then select your Wi-Fi network and use the on-screen keyboard to enter your password. Once you’re done, select CONNECT.
Your printer is capable of starting a Wi-Fi hotspot. If no Wi-Fi signals are available for connection, you can use Hotspot Mode to emit a Wi-Fi signal from Robo R2 in order to connect to it wirelessly from your smart device. To access Hotspot Mode, do the following:
- Hotspot Mode
- Select “Utilities” on the home screen of the Robo R2 touch screen
- Select “Network” from the list
- Select “Start Hotspot Mode” from the list
- Your Robo R2 is now casting it’s own wireless network
Your printer’s WiFi password
The password for your printer’s hotspot (AP mode) is the same as your printer’s serial name. For example: careful-curie.
Downloading the Robo App
- From your iOS Device
- Open the App Store app
- On the bottom dock, tap on search
- Enter “Robo App”
- Tap on the Robo App
- Tap download on the right of the icon, and rate us 5 stars if you like it!
Connecting your iOS device to your Robo R2
- Connecting via a local wifi network
Make sure your smart device is connected to the same wifi network as your Robo R2
In the ‘Dashboard’ screen of the Robo App, tap ‘+Add a Printer’ in the middle of the screen
Select ‘Scan for Printer Name/IP’
A pop up will appear with all of the printers on the same network as your smart device, go ahead and select which printer you would like to add (your printer has a unique name, example - Curious Tesla, or Brilliant Einstein). (You may look on the back of your printer and find out which name your printer has been given).
Now you will need to scan the QR code on your screen to fully connect the 3d printer to your smart device.
- On the screen of your machine, select ‘Utilities’
- Select ‘network’
- Select ‘QR Code’
Tap on ‘Scan Printer Barcode for Key’
Point your camera at the barcode and wait for the app to recognize the 3d printer
Tap ‘add printer’ at the bottom of the screen
Congratulations, you have now added your Robo R2 to your app
note that you can add multiple machines to the same app, and control each one independently
- Connecting via Hotspot Mode
- Make sure that you are connected to the Wi-Fi signal that the machine is emitting
- Follow steps in the previous section to successfully connect your printer to the app
Camera on/off
There are currently three ways to turn your camera on. By default this is off to prevent your internet bandwidth from slowing down. Make sure your Robo R2 is updated with the latest software before proceeding.
LCD Touchscreen
- Go to Utilities
- Click on Options
- Click on Webcam. Now you can select whether to turn on of off your
Web Dashboard
- Click on ‘System’ in the top right of your web dashboard.
- Next, click on ‘Start Webcam’ in from the drop down menu.
- Finally, refresh your web browser for the camera image to show up in your dashboard.
Robo iOS App (beta only)
- Navigate to your printer that you wish to see the camera.
- In the bottom right corner, tap on ‘Video’, then tap on the toggle button to turn it on or off.
Updating Your Printer
Make sure to update your printer to grab the benefits of all the latest Robo has to offer, as well as making sure your Robo R2 performs to the best of its ability.
Select UTILITIES. Then select UPDATE.
Update to the latest version and wait about a minute to get everything up-to-date. If your Robo R2 is already up to date, the button will be greyed out and say ‘up to date’.