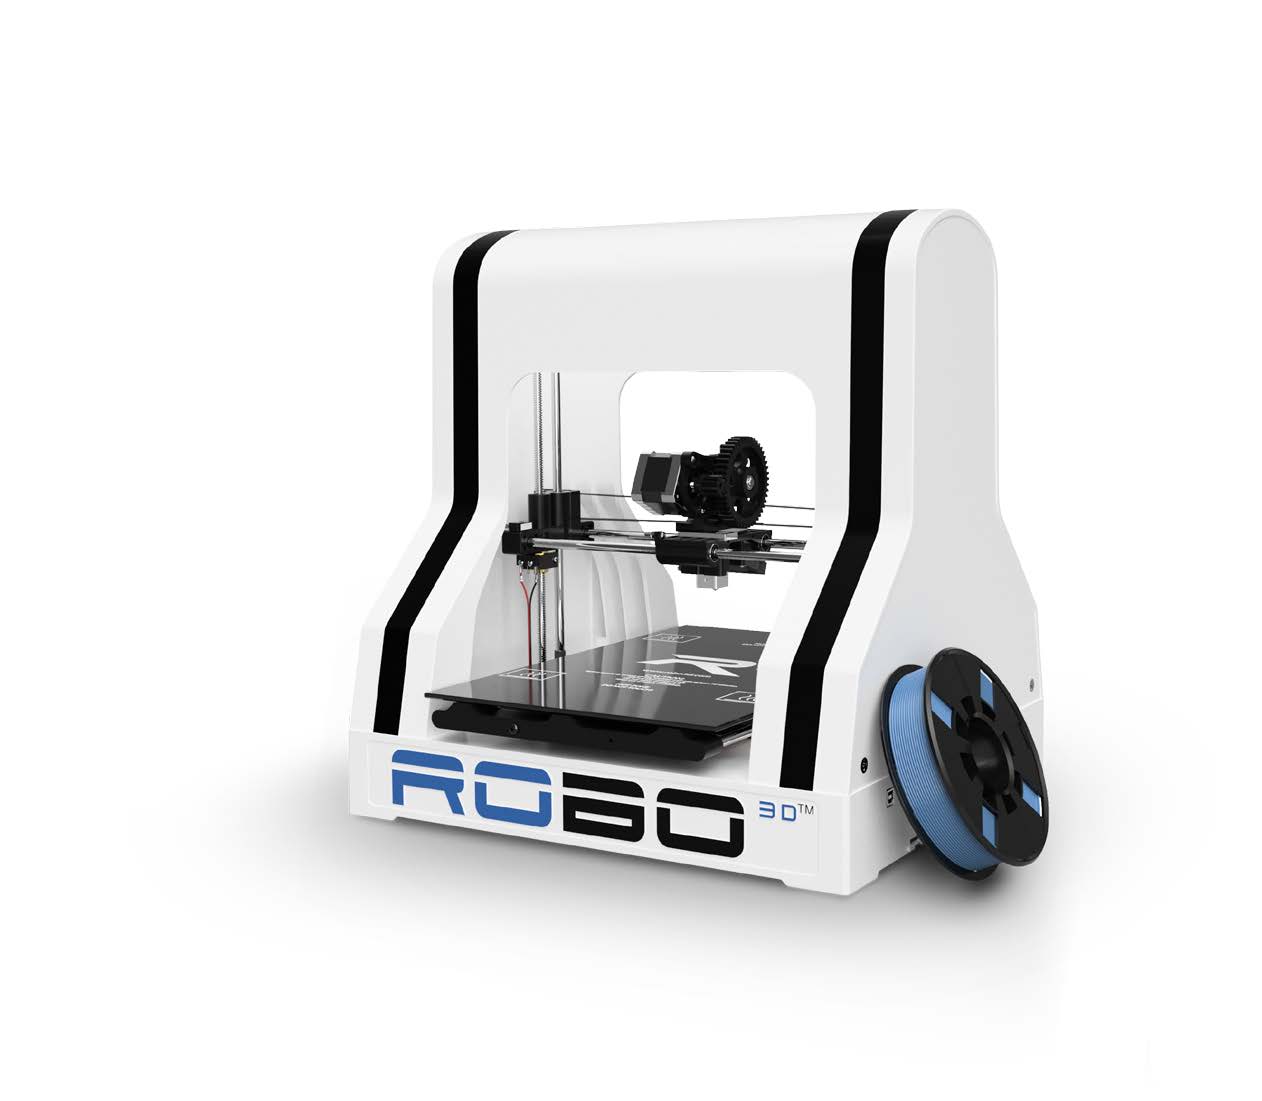
Getting Started
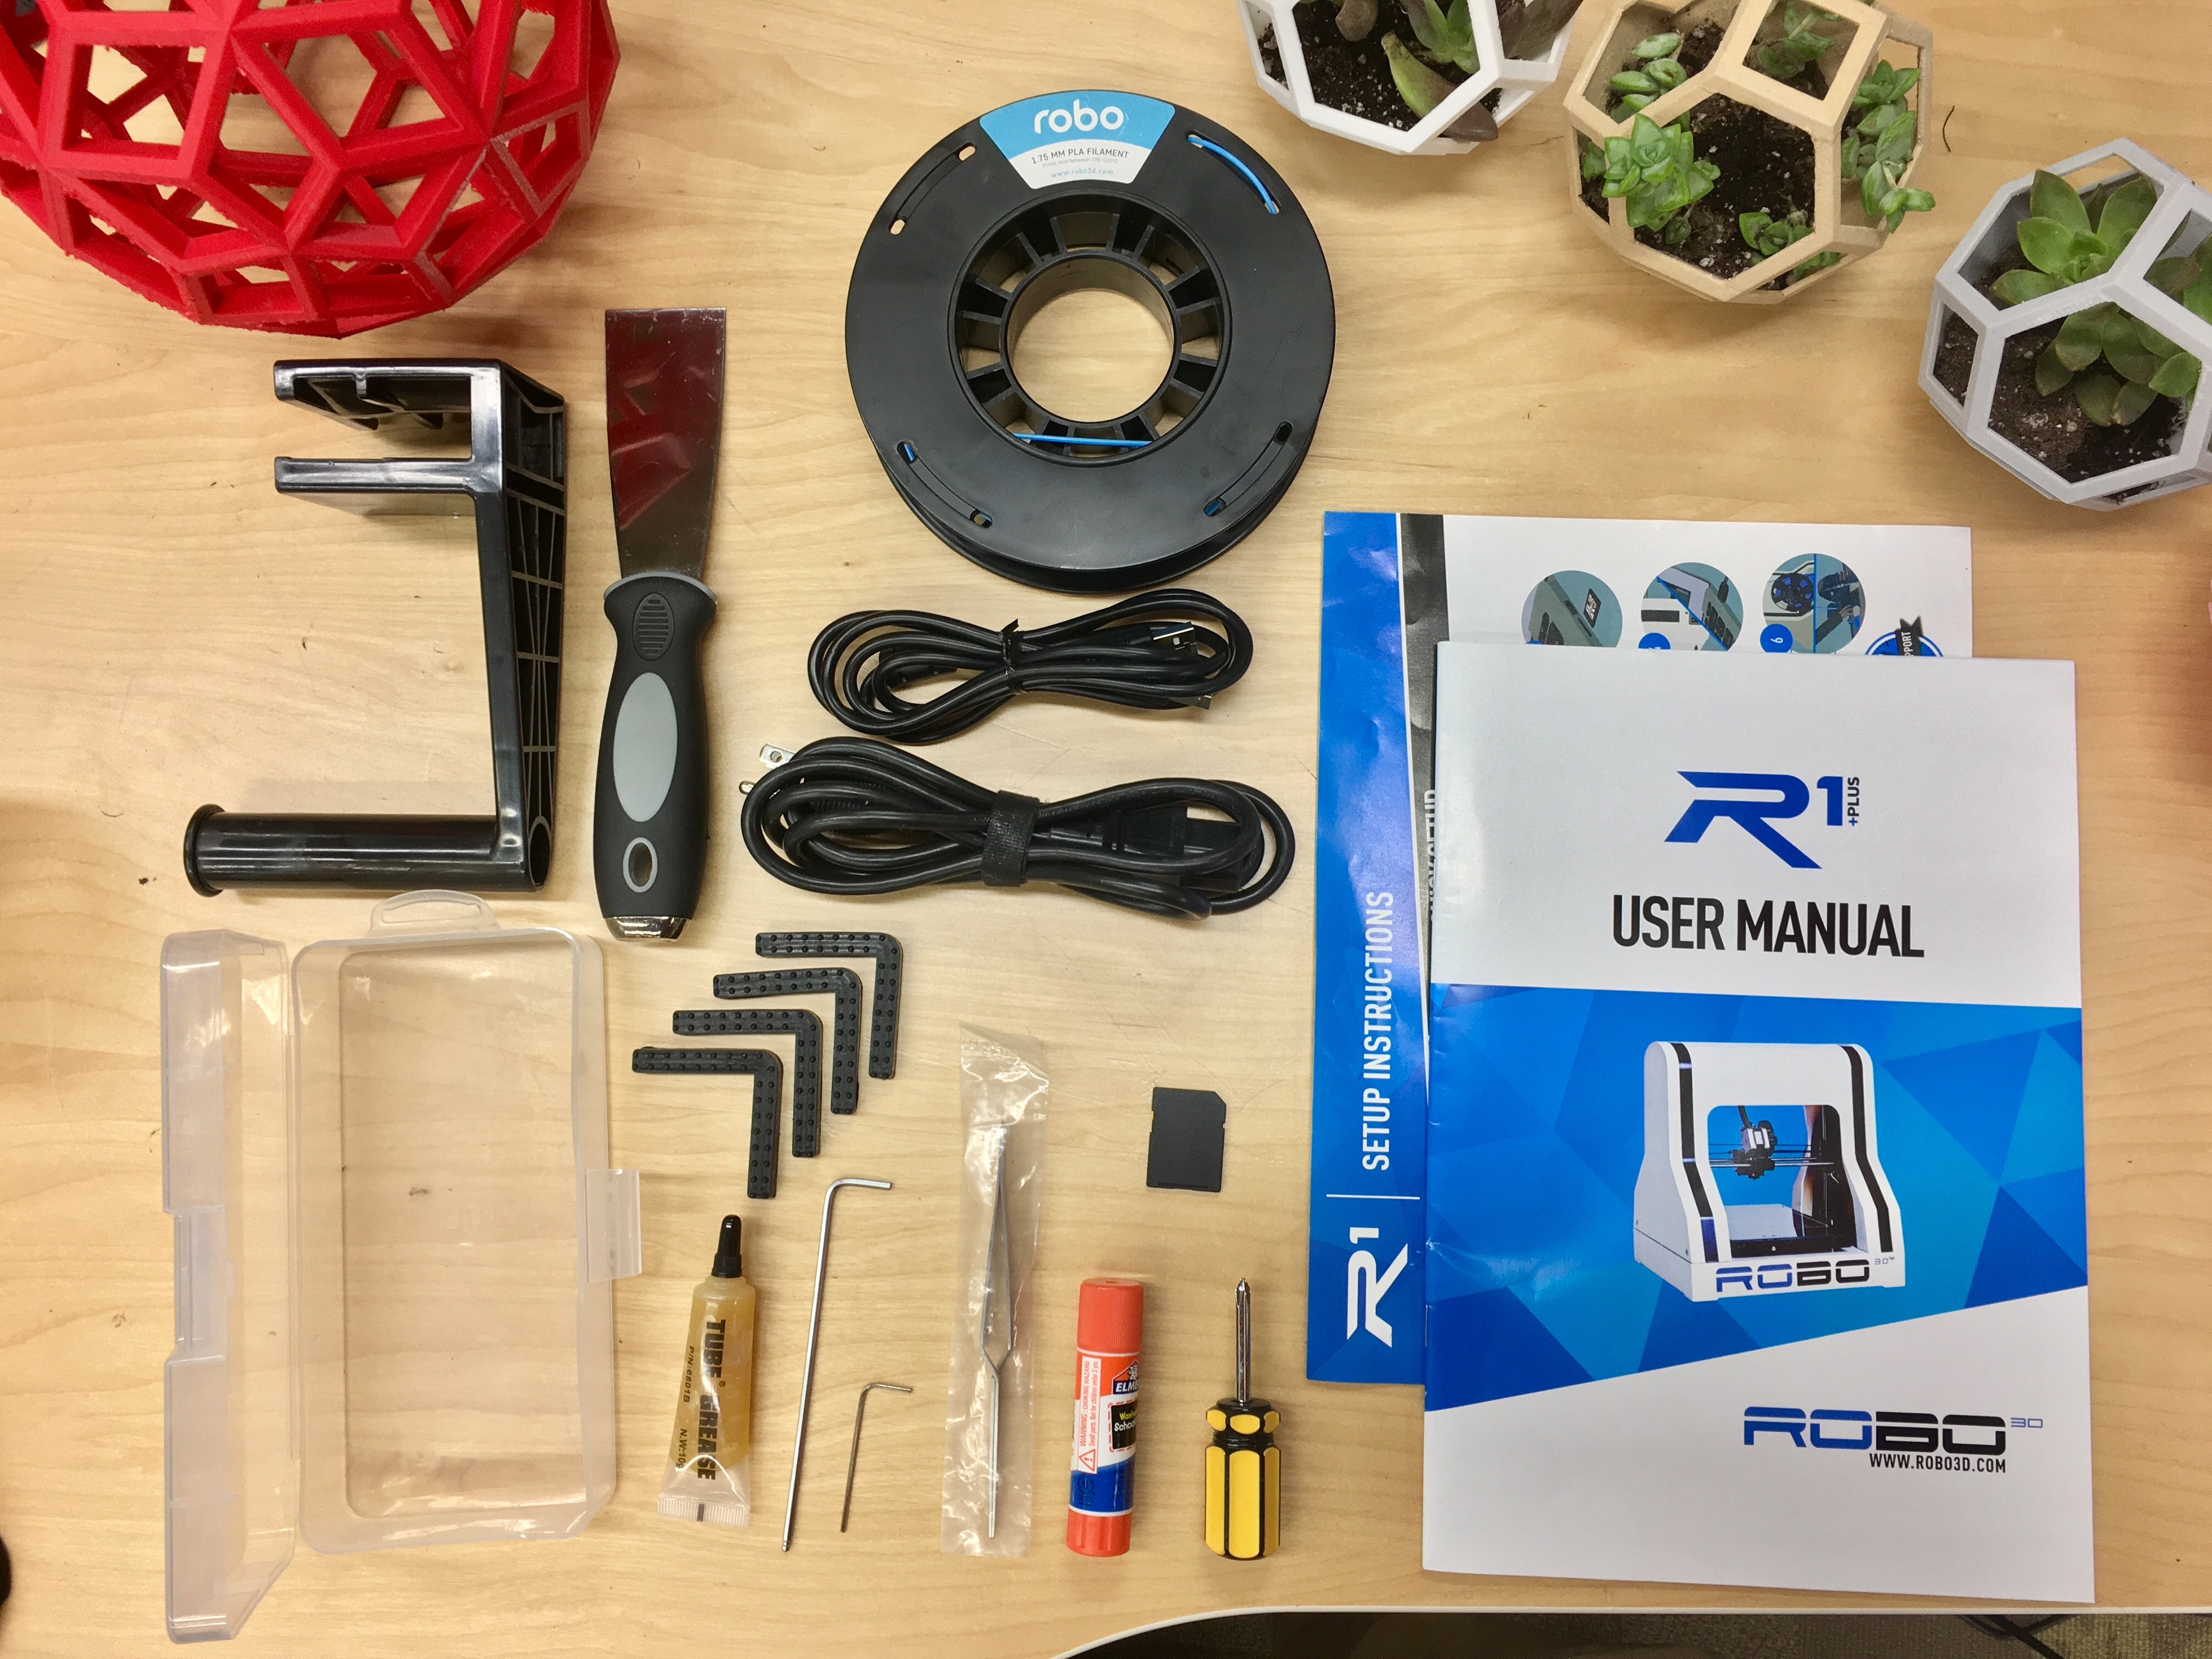
What’s in the box
Besides your new Robo R1+ Plus, you will find the following in the box:
- Setup Instructions
- Power Cable
- USB Cable
- Spool Holder
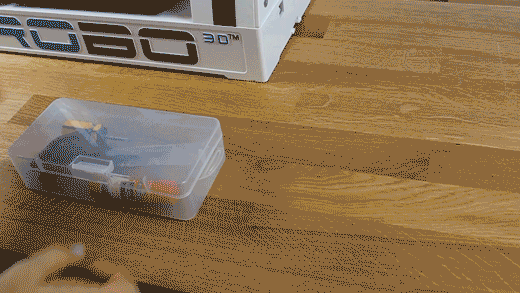
- Toolbox with lubricant, screw driver, allen wrenches, tweezers, a glue stick, and rubber feet.
- SD Card
- 300g Robo light blue PLA filament
- Spatula
- User Manual
Register your Robo R1+ Plus
Before you start, please register your Robo R1+ Plus for any servicing or warranty needs if they’re ever required. You can register your product by visiting our registration_site.
Unboxing Robo R1+ Plus
Now that you’ve received your Robo R1+ Plus, it’s time to unbox it and get familiar with your printer and accessories.
- The printer’s accessories are stored in the top foam piece of the printer. Remove these pieces from the top foam.
- Your R1+ Plus is housed in 4 styrofoam pieces, one on top, one on bottom, and two from the sides. Simply lift the top foam piece off and set to the side. Now lift the printer out with two hands and set on your desktop.
- Now we are ready to take out the inner packing material. There are 4 pieces of foam that we need to take out. Two on the sides of the printer, and two just below the glass build plate. Go ahead and slide those out.
- Finally, extend the ribbon cable from the back of the print bed so that it is no longer folded into the printer.
Tip
Save your printer box and foam inserts for transportation. Also, you might need the original packaging to exercise your warranty or ship your printer in the future.
Initial set-up
Now let’s move forward with your initial set-up of Robo R1+ Plus.
Inside the toolbox, there are four small rubber feet. These attach to each bottom corner of your printer to make sure it doesn’t slide around or scratch your desk when printing.
Next, make sure your voltage is set correctly. On the back of the printer, there is a voltage switch that has two settings: 110V or 220V. Make sure it is set to the appropriate voltage for your country. You can use the end of one of the included allen wrenches to slide the switch.
From here you’ll want to connect the power cord to the designated area on the back of the printer and then plug it into an AC outlet. Now go ahead and turn on the printer.
Installing the required software
The Robo R1+ Plus comes with an SD Card, which contains the software required to run the Robo R1+ Plus. Take these steps to install the software and connect your printer.
- Plug SD Card into your computer.
- Click on the Windows or Mac folder depending on which operating system you have.
- Choose MatterControl setup to begin installing MatterControl Software on your computer.
Note
You can also directly download Matter Control from our website.
Connecting Robo R1+ Plus to MatterControl
Here we will add Robo R1+ Plus to the MatterControl software which will enable you to control your printer.
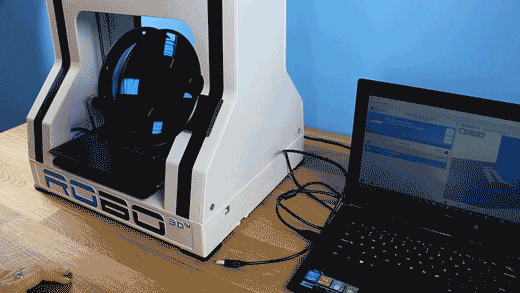
Open up MatterControl that you installed from the previous section. Connect your printer to the computer USB port via the USB cord that was provided with your printer.
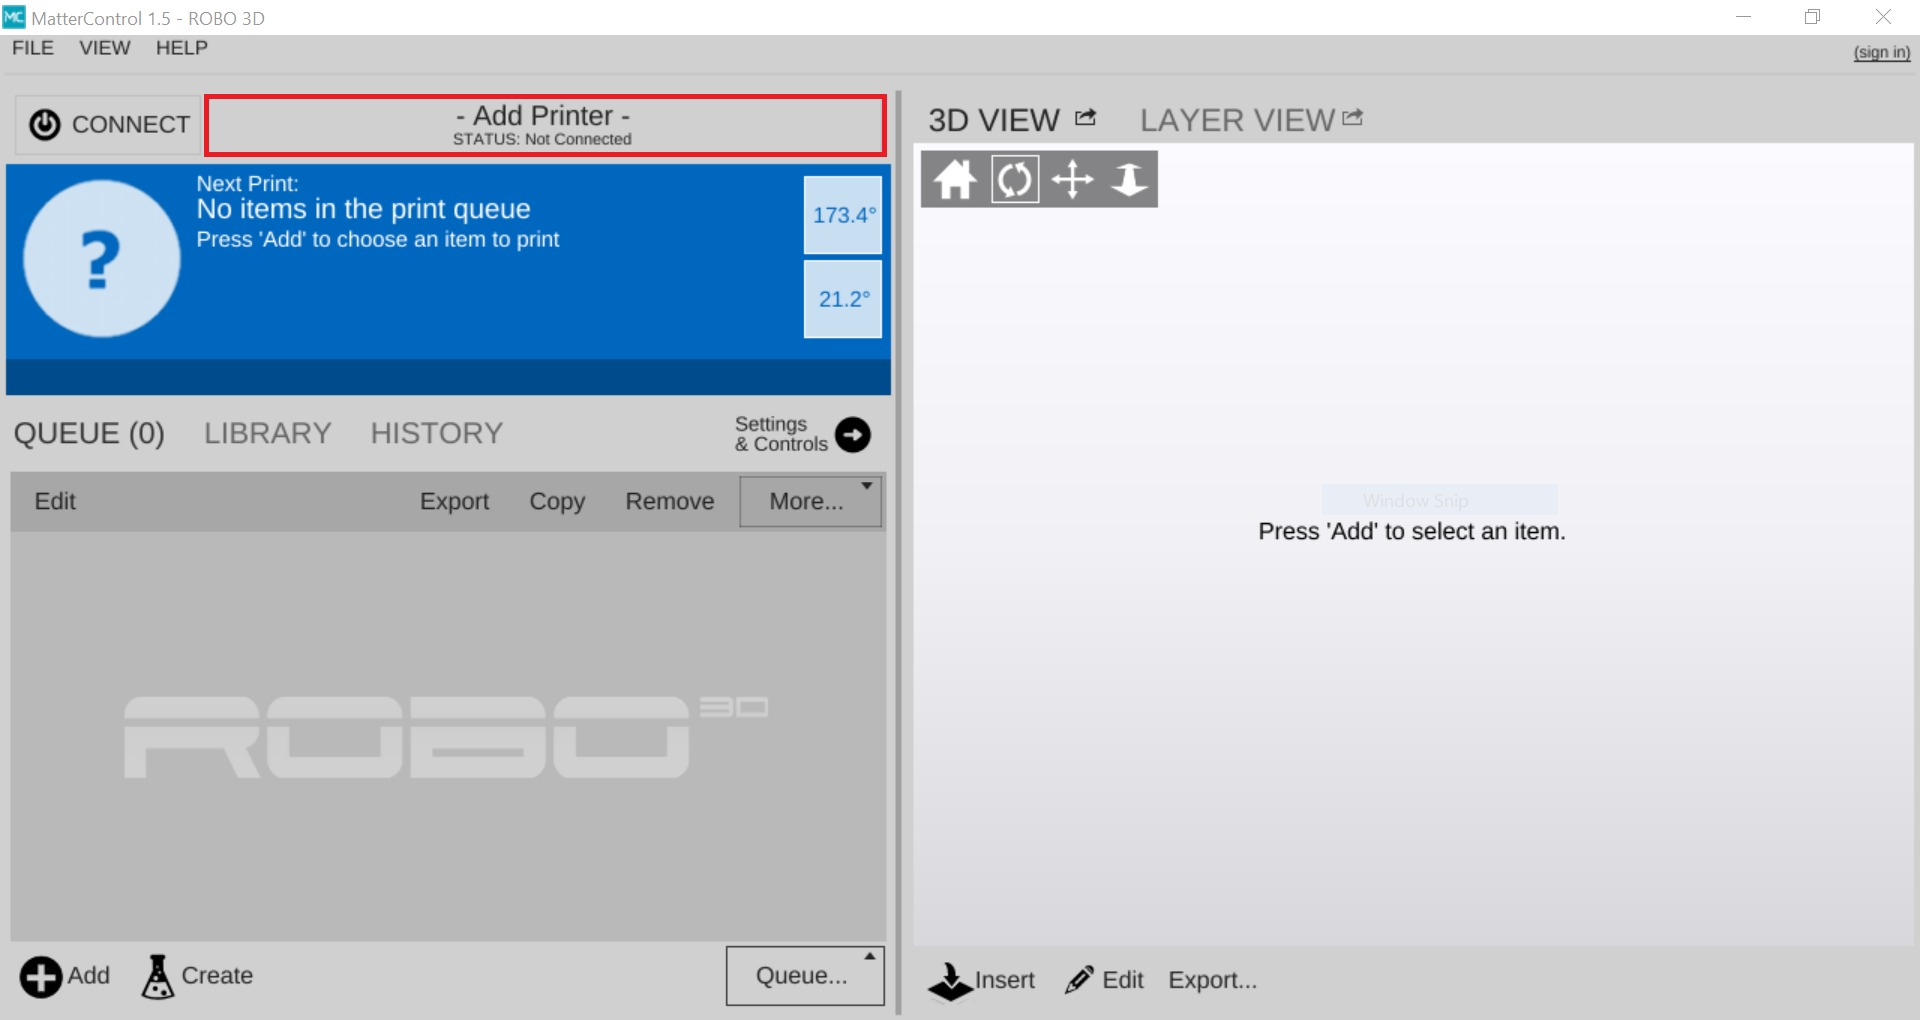
Once MatterControl is open, click the ‘Add Printer’ button towards the top of the screen.
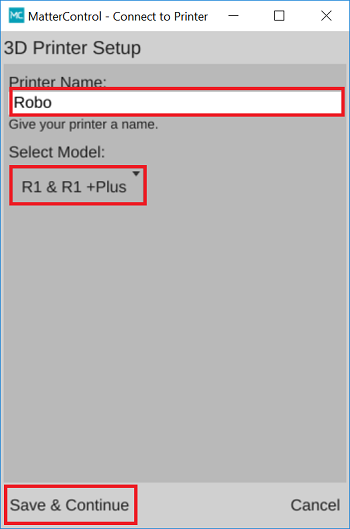
A new window will pop up and you will be able to set up a 3D printer. From here you can assign your Robo R1+ Plus a nickname. This can help you keep track of multiple units. Select “R1+ Plus” from the model list and then click Save & Continue.
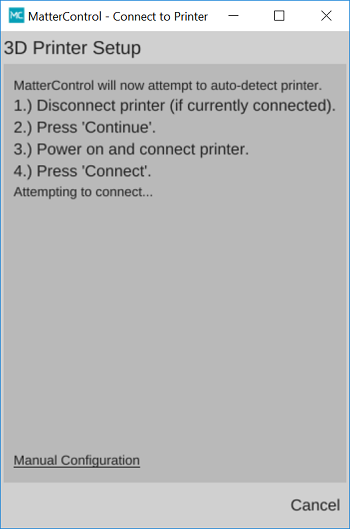
Now a new set of windows will open and prompt to “Install Communication Driver”. Do this by clicking “Install Driver” in the bottom left corner of this screen. Once the driver is finished installing, a new window will appear. Follow the instructions on this screen. First disconnect your computer from Robo R1+ Plus (if currently connected) by unplugging the USB connection on either the computer or printer side, then click Continue. Next, reconnect your printer when it prompts you (make sure your R1+ Plus is turned on). Once the printer connects, you will see a “Connection Succeeded!” message. From here, click “Done”.
You have successfully connected your R1+ Plus!
Loading filament
Before you begin a print you need to load filament. Follow these steps to properly load your printer with filament.
Take the spool holder that came with your printer and put it on by simply sliding it onto one of the sides of the plastic top cover.
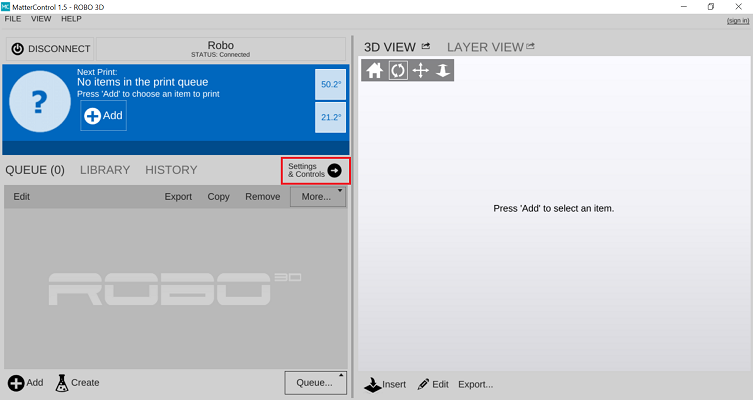
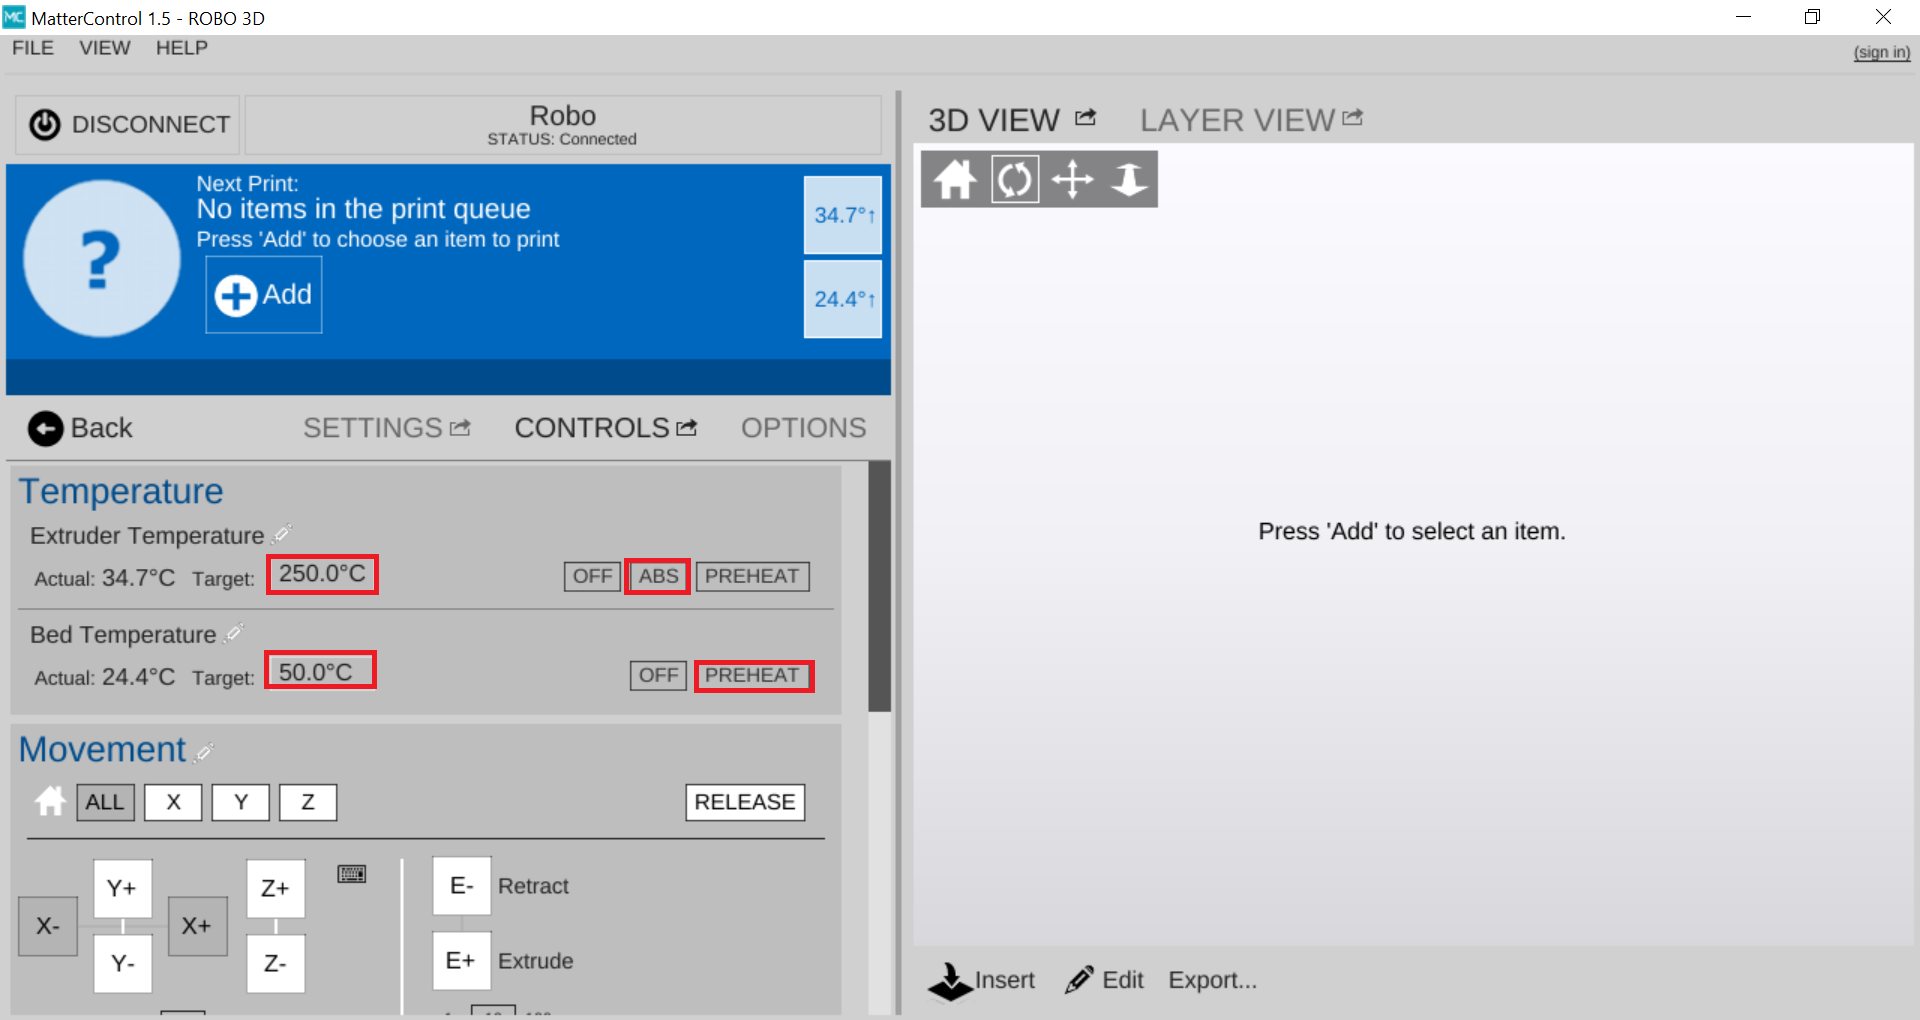
To begin loading filament you need to preheat your nozzle through MatterControl. On the Main Dashboard, click Settings & Control
You can either click the PREHEAT button to preheat the print to a default temperature of 210C, or create your own presets by clicking the pencil next to Extruder Temperature.
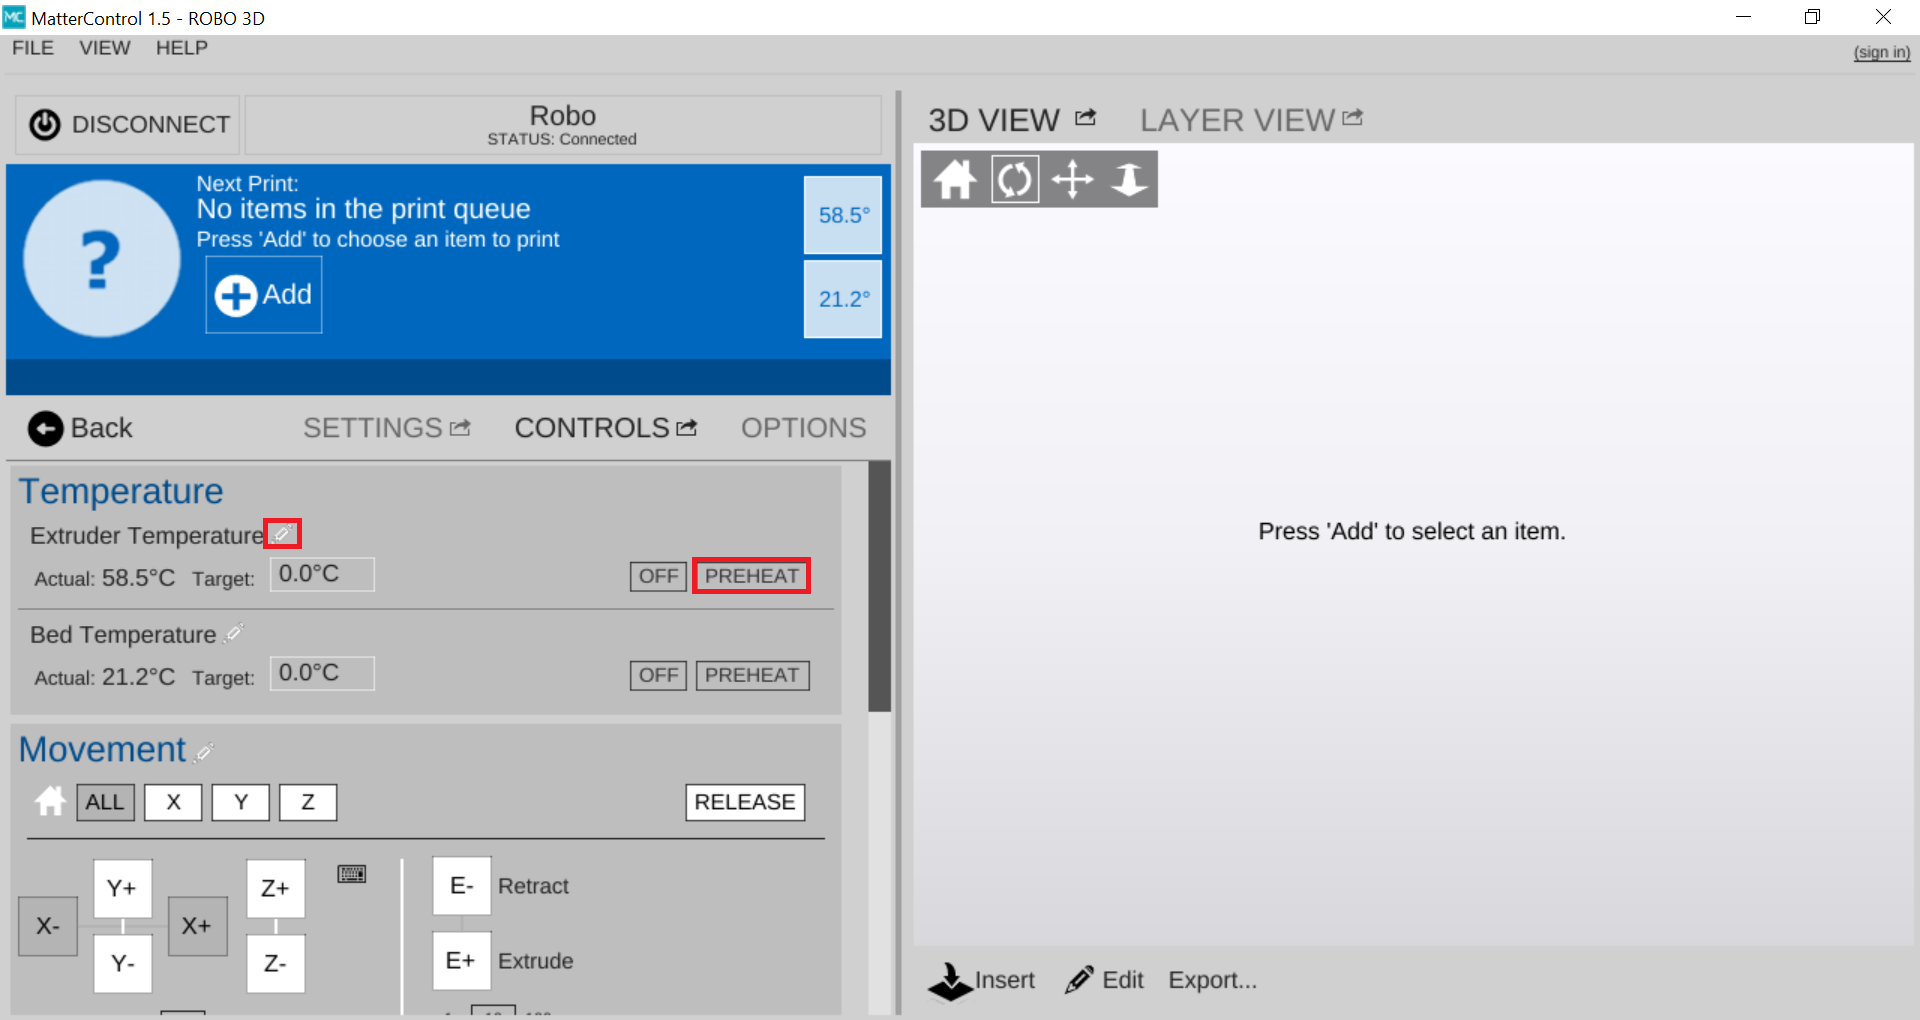
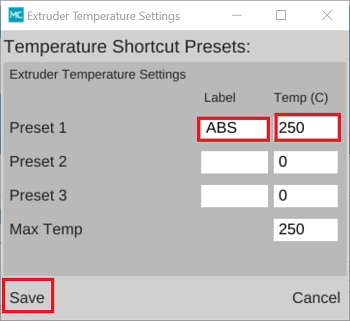
If you choose to create your own preset, a new Window will popup after clicking the pencil icon. In this window you can set up to 3 custom presets. Once you name the preset and designate a temperature, click Save.
After you click PREHEAT or one of your own presets, you should see the target temperature change to your desired temperature.
Note
You can preheat and create presets for the bed as well but it’s not necessary for loading filament
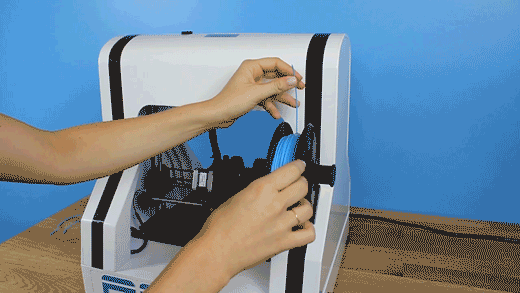
While that is heating up, hang your filament spool on the spool holder.
Be sure to unroll at least 11”— or 30 centimeters — of filament and cut the tip with a pair of scissors.
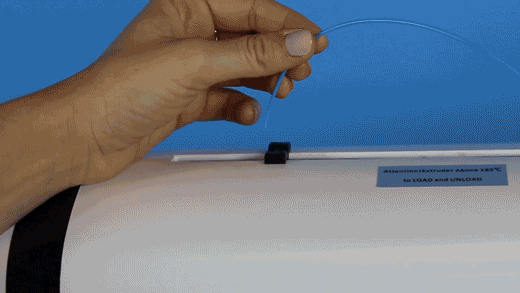
Now thread the filament through the filament guide at the top of the printer.
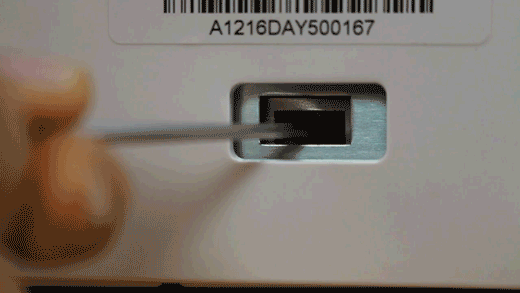
Insert filament down through the filament gear, you may need to pull back the filament latch to thread the filament into the extruder.
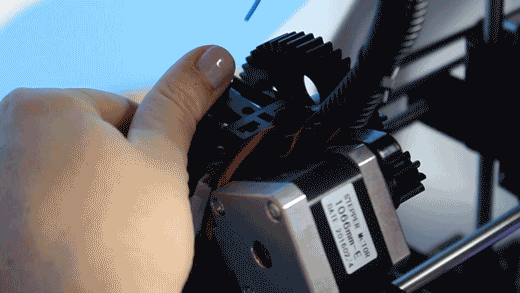
Once inserted, turn the filament gear until you see filament coming out of the extruder nozzle.
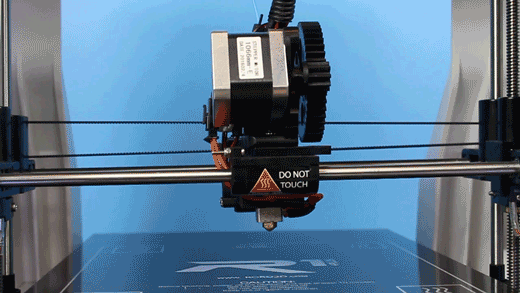
Now you’re ready to start printing!
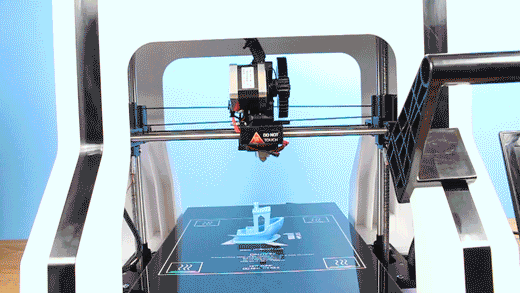
The first print
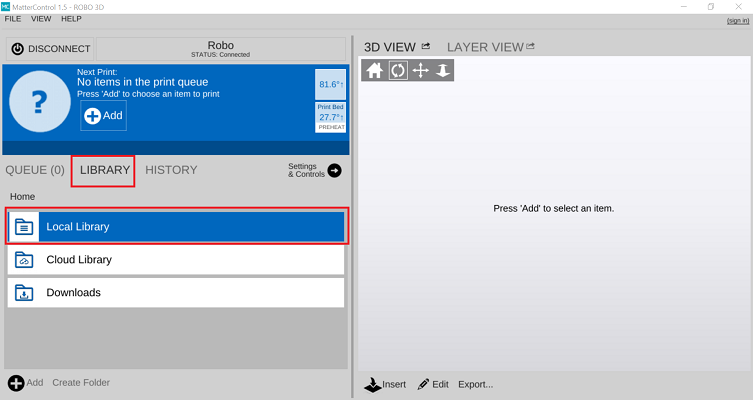
To start your first print. You can either load your own file, or choose one of the preloaded prints inside the local library. To print one of the preloaded files, navigate to the library tab and then select the Local Library.
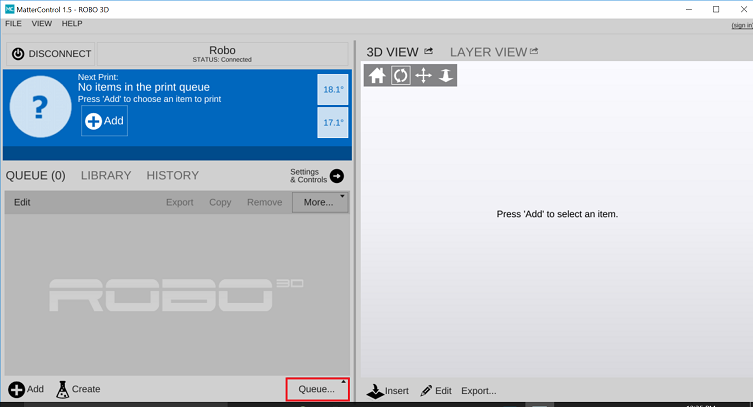
If you don’t want to keep your computer connected to your printer for the duration of the print, you can also start a print straight from the SD Card!
After loading files onto the SD Card from your computer, insert it into the printer.
First click QUEUE at the bottom right of the dashboard.
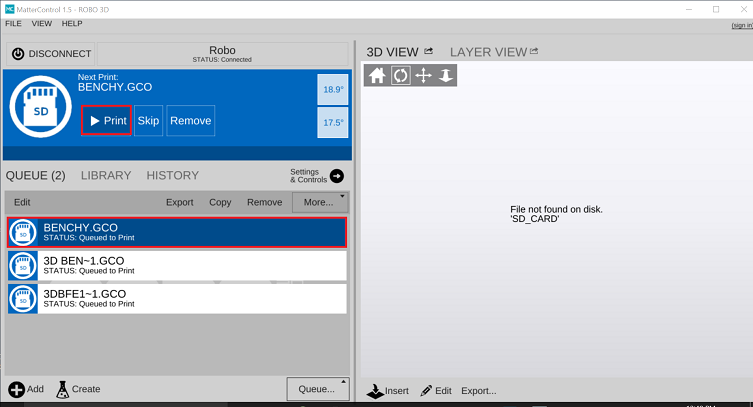
Then select Load Files under SD CARD

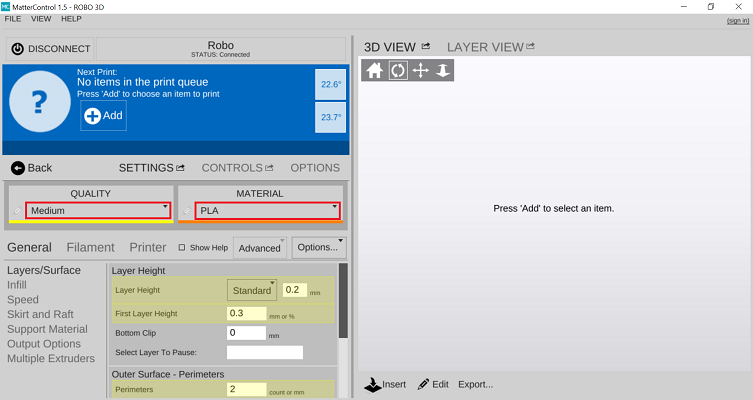
Before you start a print, make sure to double check your slicing settings. To do that, under Settings & Control, select Settings. For most of the preloaded prints, default settings will suffice and all you need to do is make sure the material you loaded into the printer and the set material are the same. You can also select your desired print quality.
Note
For more advanced prints and geometries, you may need to edit the slice settings to ensure a perfect print.
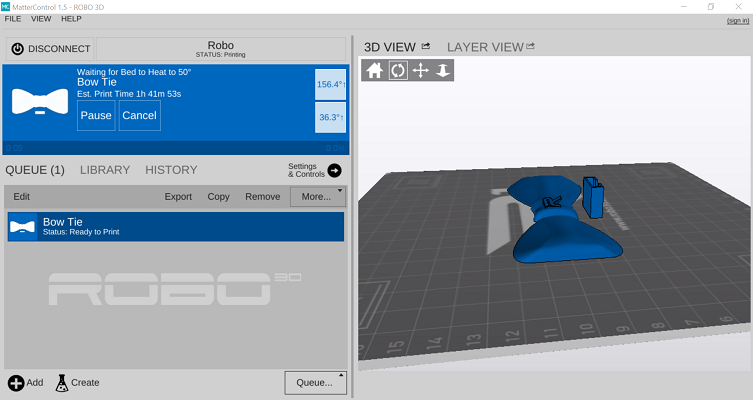
Once you select a file and finalize your settings, click PRINT towards the top left of the window and your printer will begin preheating. Your R1+ Plus will begin printing as soon as the printer is completely preheated.
Note
You can select PAUSE to pause your print, or you can select CANCEL to cancel your print.
Removing the first print
When the test print is complete and cooled down, use the provided spatula to carefully remove the print at its borders. Then, slowly work your way underneath the print until it’s loose. Don’t force the print loose by pulling it up directly up from the print bed, since this may cause your print to break.