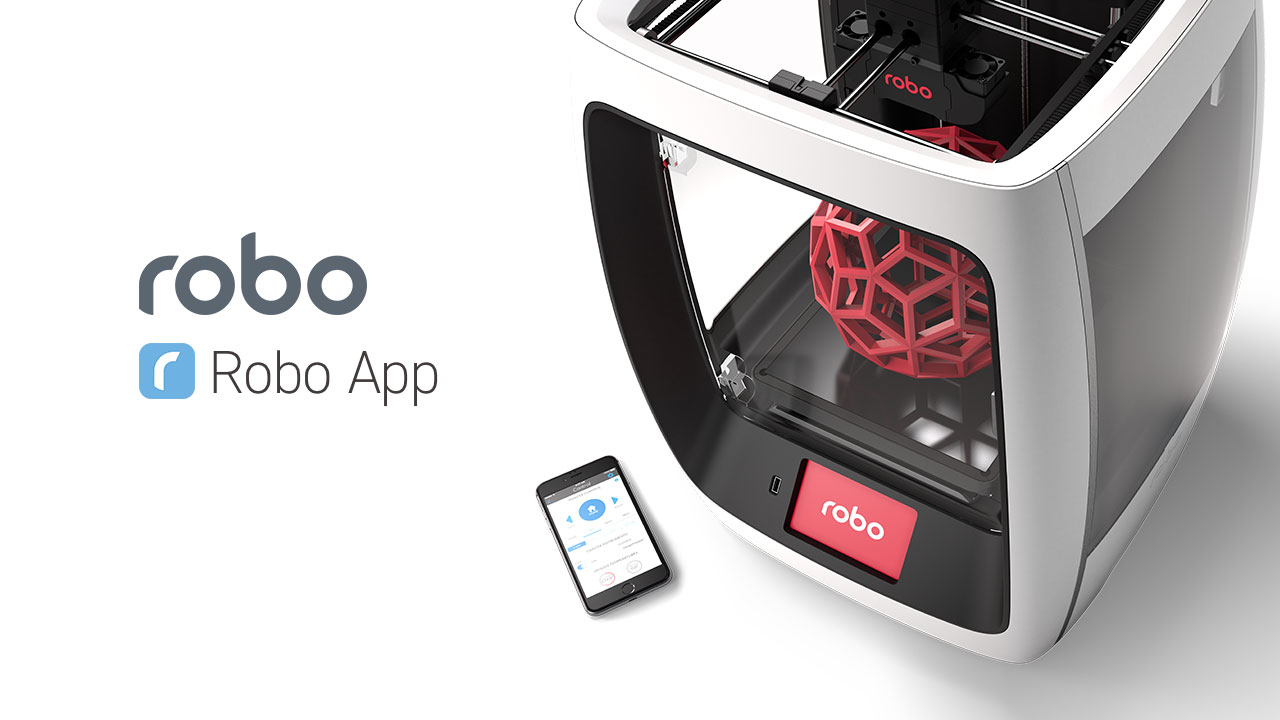
Robo App for iOS
Overview
- Connect to your local Robo C2 or Robo R2 3d printer
- Slice models directly on Robo C2 or Robo R2
- Monitor progress via the dashboard
- View your creation via Robo R2’s integrated camera
- Remotely control your Robo C2 and Robo R2 via your iPhone or iPad
Logging In
The first time opening the Robo app you will be brought to a End User License Agreement. Once you accept, you will be brought to a login page.
To you the Robo app, you can either link your Facebook account or continue as a guest. Once this is done, you will be taken you to your dashboard.
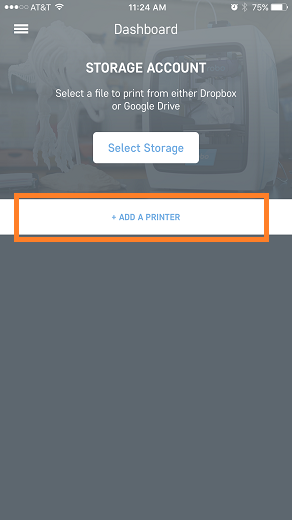
Adding a Printer
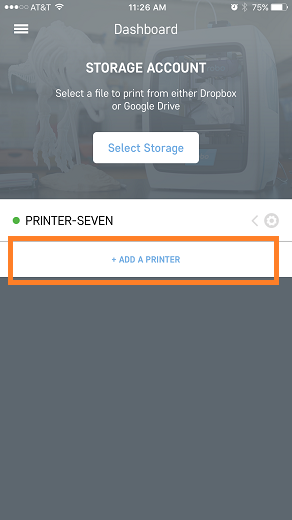
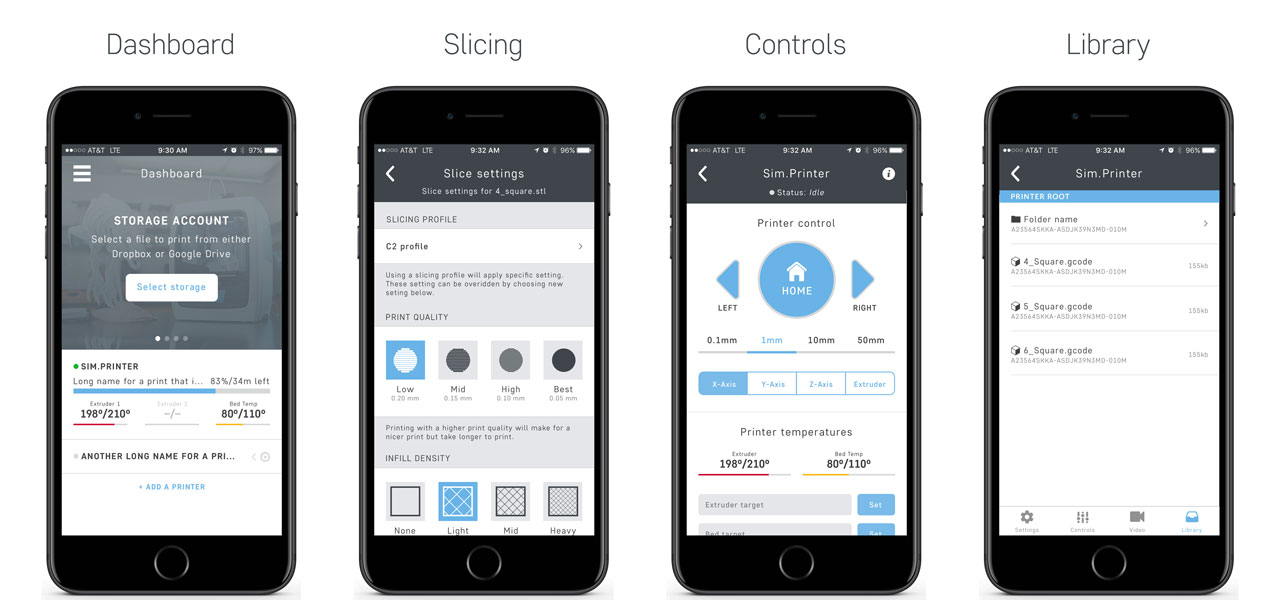
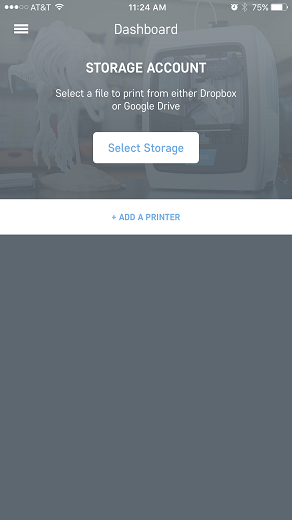
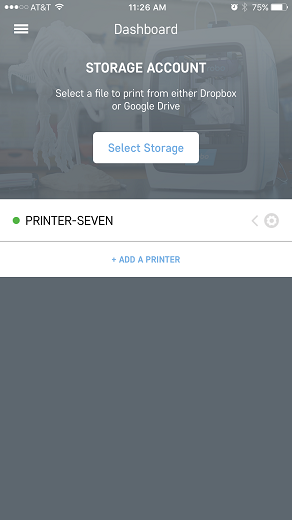
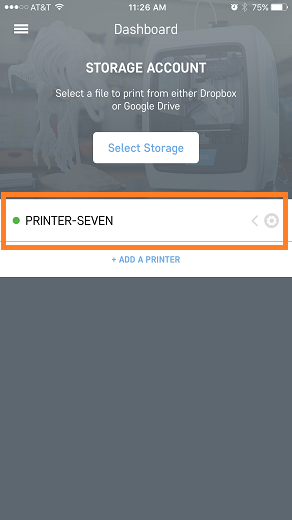
Once you are in the Robo app, the first screen that will appear is the dashboard. From here you can add a printer that is on the local network (make sure your printer is connected to a wifi network).
First, click the ‘Add Printer’ button towards the middle of the screen. This will take you through a series of steps to set up the new printer on the Robo app.
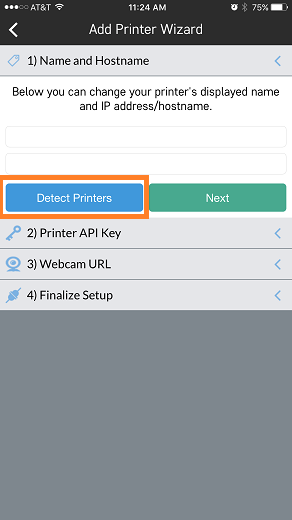
Next, follow the steps to add a printer. Scan for local printers that are the network by pressing the scan button. This will bring up a pop up that will show all of the available printers on the local network. Choose your printer and it will add it to the line automatically. You can name the printer as well in the provided text box.
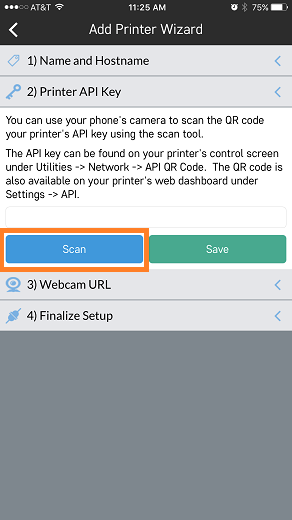
Then, you will want to add the API key that is located on your printer. Press the ‘scan’ button and it will bring up the camera. Now, you will need to scan the QR code that is physically located on your printer. Go to your printer and from the main screen go to Utilities> Network> API Key. Here, an API key will show. Go ahead and scan this API key with your iOS device and it will get added automatically to that section of the app.
The next section is the video section. If you have a Robo C2, you can skip this part. If you have a Robo R2, go ahead and scan for video. It should find it automatically and add it.
Next, it will ask if you want to set up profiles automatically. If it is a new printer and you want to add profiles that are built for the Robo C2 or Robo R2, go ahead and click the add profiles button. If you would like to manually set up your profiles, you can do that too.
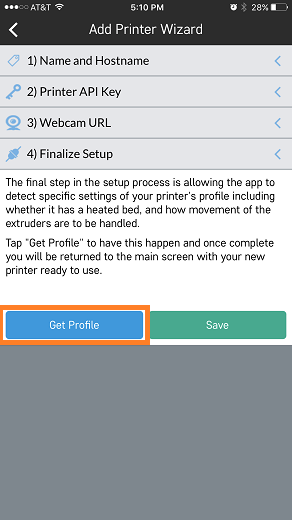
Once these profiles are added, you will be taken to the dashboard screen and you should see your new printer ready to go.
Congratulations, you have now added your printer to remotely monitor it from the Robo app..
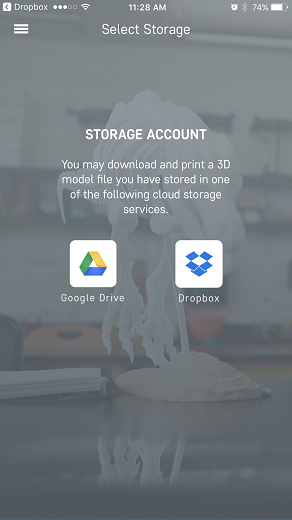
Linking Cloud Storage
Within the Robo app, the ability to link cloud storage makes it easy to access your files from anywhere, without the need for a computer.
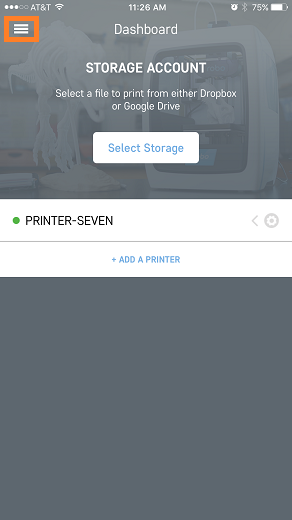
From the dashboard view, click on the menu tab in the upper left hand side of the screen. This will open up a menu list. From here, click on ‘Your Settings’ menu item.
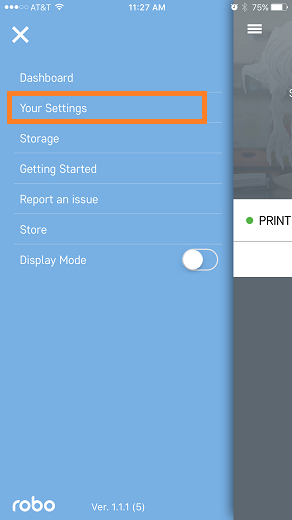
Once in your settings, log into your Dropbox and Google Drive accounts by clicking ‘Log In’ next to their respective names.

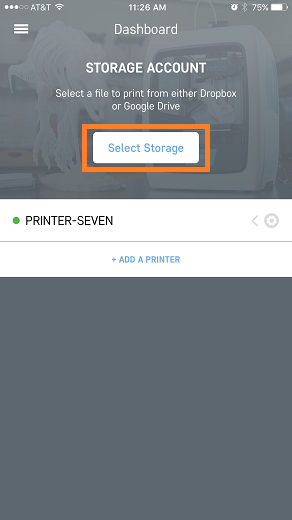
Now, since you are logged into your cloud storage accounts, you can click on ‘select storage’ from the dashboard and successfully see all the files that are in your cloud stage accounts.
Quick Workflow
There is an easy workflow to get from file to printing and these are the steps to do it:
- Make sure you are logged into your Google Drive or Dropbox account.
- Go to your browser on your iOS device, and find a file on a file sharing site. We suggest www.thingiverse.com or www.myminifactory.com
- While still in the browser, upload that file to your Google Drive or Dropbox account.
- Next, go into the Robo app.
- In the dashboard, click on the button labeled ‘Select Storage’.
- Now select the storage where you had uploaded the file to.
- Once you are in here, find the file that you had uploaded and click on it. This will bring up a pop-up of which printer you would like to send the file to.
- Select the printer you want to print the file with, and it will go directly into either slicing mode, or a page that will allow you to start the print.
Printer Controls
If your printer is not currently in a printing state, you can control different aspects by clicking directly on the name of the printer you want to control from the dashboard.
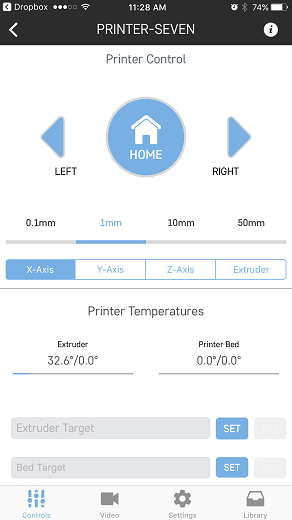
Here you can move motors, heat up your nozzle, as well as view your terminal, which will show you what commands your printer is currently reading.
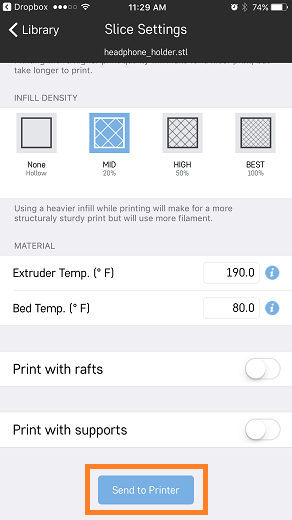
Slicing a model
If you have an STL file that is saved in your cloud storage or on the printer itself, you can slice the file and get it ready for printer through the app by using these steps:
- Go to your library either on your cloud storage or on the library within the printer. Once you click on an stl file you wish to print, you will be taken to a slicing wizard screen.
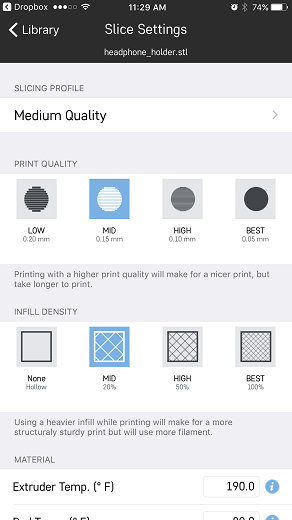
- On this slicing wizard screen, you have the choice to change your layer height, infill percentage, temperatures, and printing with supports and rafts.
- Once you have selected your settings, click the ‘Send to Printer’ button at the bottom of the page and choose which printer your would like to send it to.
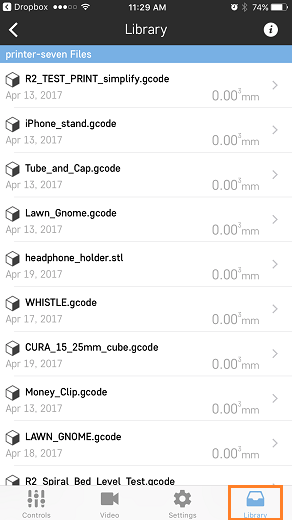
Library
If you want to see which files are currently on your printer, first, click on the printer name from the dashboard. Next, in the bottom right, click on the library button to view all of the files on the printer.
Connecting your printer to wifi
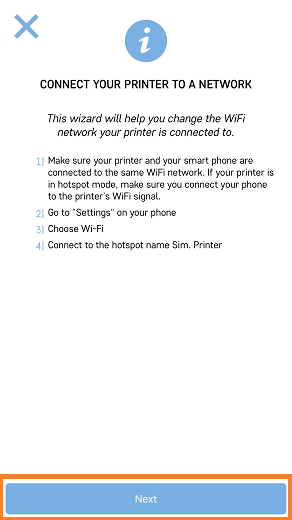
If you want to connect your printer to a wifi network, or change the wifi network through the Robo app, there are a few steps to take.
- First, make sure your iOS device is connected to the same signal as your printers wifi signal. If the printer is in hotspot mode, connect your iOS device to that same network.
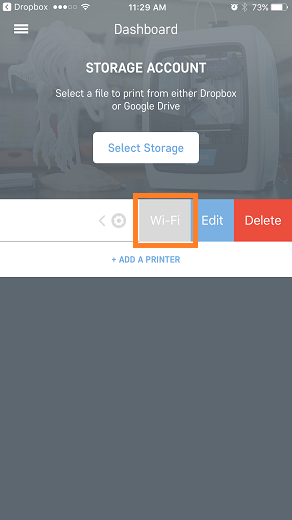
- Now, go into the Robo app and go to your dashboard.
- Look for the printer you would like to connect to a local wifi network.
- Swipe left on the printer name from the dashboard screen, and click the ‘wifi’ button that is shown.
- Follow the on screen instructions to connect your printer to a wifi network.
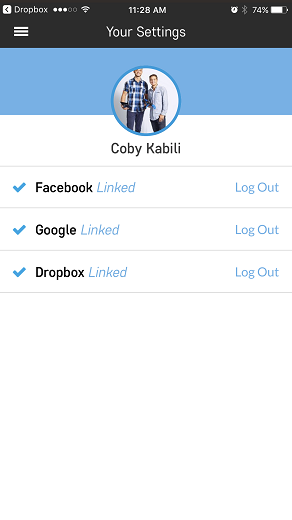
Your Settings
Your Settings is the area of the Robo app where you can log into your Facebook, Google Drive, and Dropbox accounts. Tap on the ‘Menu’ button in the top left corner of the dashboard screen. On the left hand side, click on ‘Your Settings’.
You will see three accounts you can log into: Facebook, Google Drive, and Dropbox. If you are logged into Google Drive and Dropbox, you will be able to access your cloud libraries and print directly from the app by downloading these cloud files to your printer.
Store
If you want to visit the Robo store for filament, accessories, or new 3d printers, you can access it right from the Robo app. First, click on the menu icon from the dashboard. Then, click on the ‘store’ menu item from the menu on the left. This will take you to the Robo store in your browser on your iOS device.

Multiple Printers
If you have multiple printers on the same network, you can manage them all from within the Robo app. To add an additional printer to your dashboard, simply select the ‘Add Printer’ button below the last printer on your dashboard, and follow the instructions listed from the section ‘Adding a Printer’.