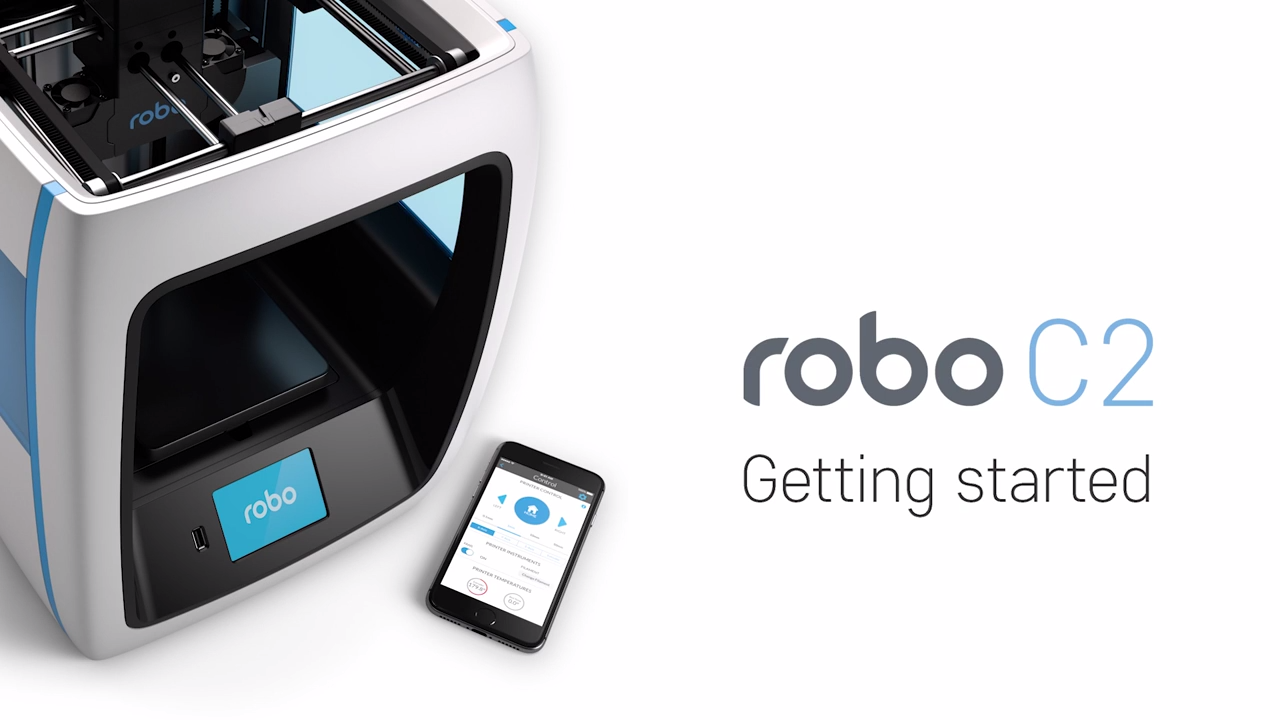
Getting Started
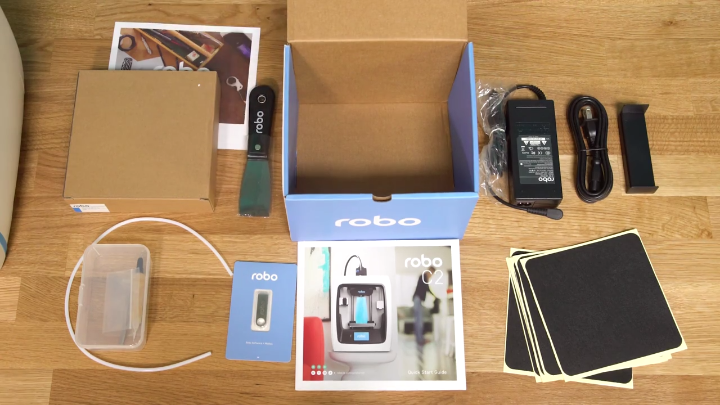
What’s in the box
Besides your new Robo C2, you will find the following in the box:
- Quick Start Guide
- Autodesk Fusion 360 design software free 1-year voucher
- 9 print bed tape covers (with 1 BuildTak sheet already applied to your print bed).
- Robo stickers to place EVERYWHERE.
- 19V power supply
- Filament Guide Tube
- 2 filament spool arms
- Toolbox with the hotend cover, 2 allen wrenches, lubricant, and stylus.
- Robo USB drive
- 300g Robo light blue filament
- Spatula
Unboxing Robo C2
Now that you’ve received your Robo C2, it’s time to unbox it and get familiar with your printer and accessories.
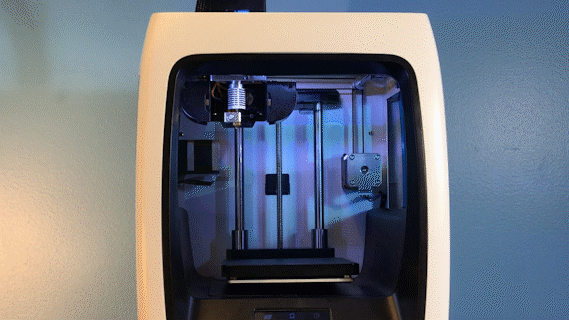
Your C2 is housed in 3 styrofoam pieces, secured together by a nylon strap. Simply lift the printer from the box using the strap and set it down.
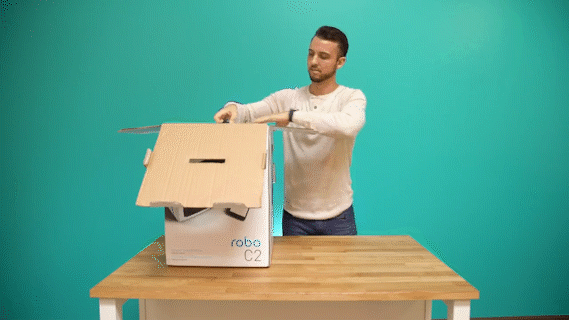
Unclip the black nylon strap and remove the two halves of the top styrofoam shell.

Finally, using the handholds on the bottom of your C2, lift the printer out of the bottom styrofoam piece.
Tip
Save your printer box, nylon strap, foam inserts, and inclusions box for transportation. Also, you might need the original packaging to exercise your warranty or ship your printer in the future.
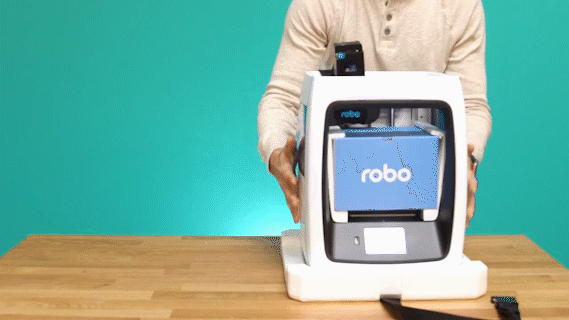
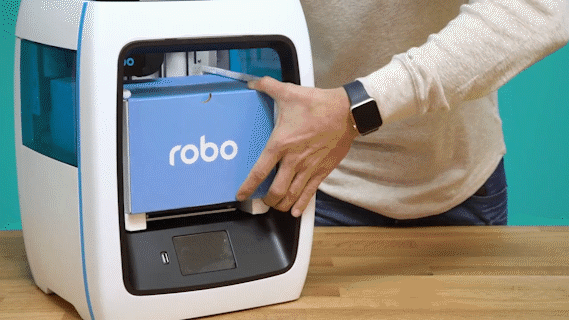
The printer’s accessories are stored in the inclusions box inside the printer. Simply slide the inclusion box out and be sure to remove the foam.
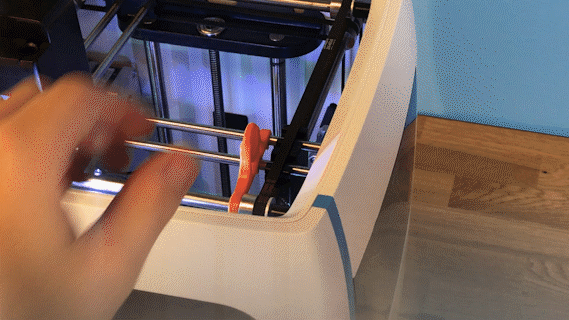
Now we are ready to take off the additional shipping material and zip ties. There are 4 orange rod holders that need to be taken off. Simply push on the clip and it will come off. There is one at each corner of the top gantry.
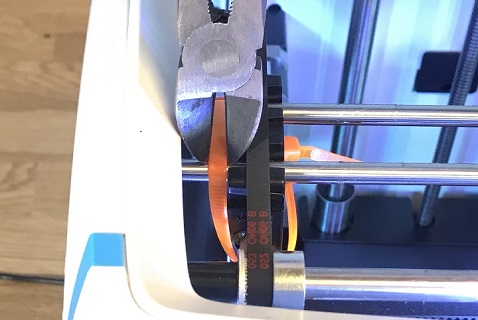
Next, remove the zip ties securing the rods to their plastic brackets
Register your Robo C2
Before you start, please register your Robo C2 for any servicing or warranty needs if they’re ever required. You can register your product by visiting our registration_site.
Initial set-up
Now let’s move forward with your initial set-up of Robo C2.
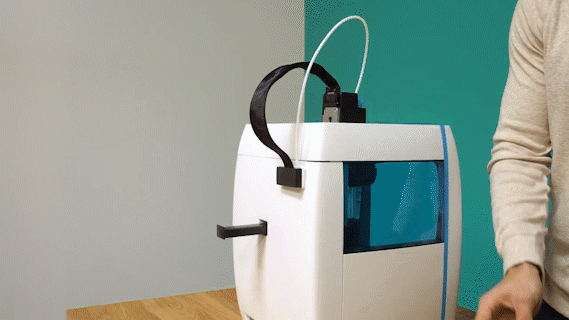
First, insert the spool holder into the rear slot of the printer. Make sure the taller tab is inserted first.
Next, insert the filament feed tube into the filament sensor block, and then insert it into the extruder.

Inside the toolbox you will find the hotend cover. Go ahead and take that out and place it over the hotend. It is held in with magnets so it just pops right in.
From here you’ll want to connect the power cord to the designated area on the back of the printer and then plug it into an AC outlet.
Now go ahead and turn on the printer.
Connecting to Wi-Fi
We highly recommend connecting Robo C2 to your Wi-Fi network. Doing so provides you with necessary updates that allows for a more enjoyable 3D printing experience.
Note
You can also use an Ethernet cable (LAN) to connect Robo C2 directly to your Wi-Fi network.
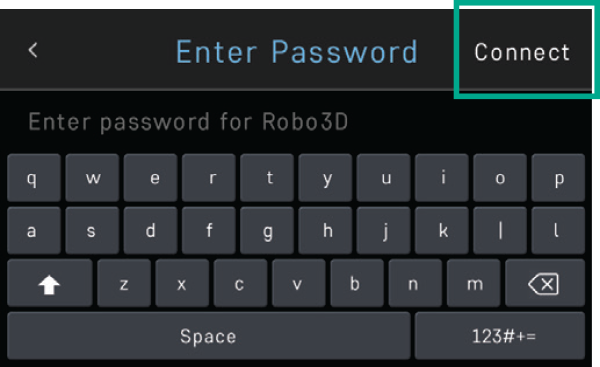
To begin connecting to your Wi-Fi network, Select UTILITIES on home screen.
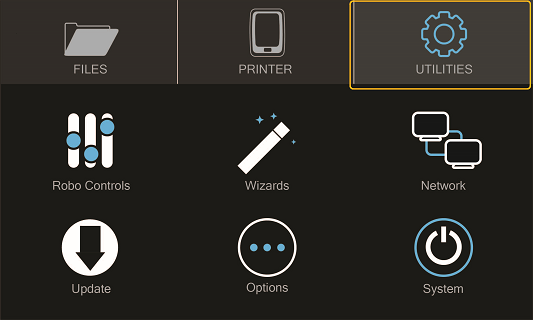
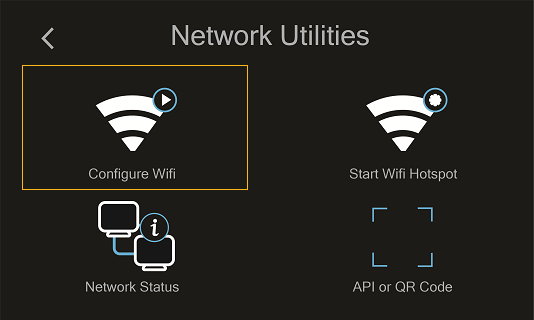
Select NETWORK.

Select CONFIGURE WIFI.
Then select your Wi-Fi network and use the on-screen keyboard to enter your password.
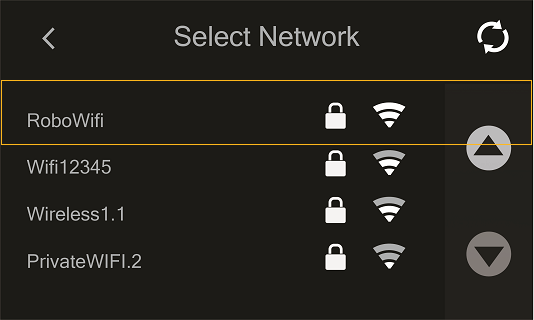
Once you’re done, select CONNECT.
Updating Robo C2
Ensure your software is up-to-date - it’s the best way to confirm that your machine is operating with the most recent functionalities available whenever we release them.
Select UTILITIES on the home screen
Select UPDATE
Screen will say UP_TO_DATE if software is already updated. If not, select UPDATE and the update will begin.
Note: Follow this process regularly to ensure software is always up to date.
Calibration and setting Z offset
Next you’ll want to calibrate Robo C2 by selecting UTILITIES on the touch screen, and then select WIZARDS from the list.
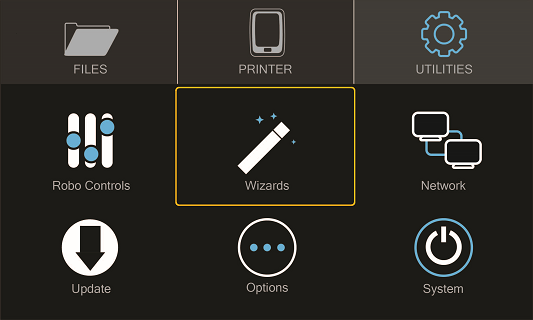
From here you’ll select Z OFFSET WIZARD.

Now, the printer will wait to calibrate its home position
Press up and down on the arrow buttons while sliding a piece of paper between the nozzle and the print bed until you feel some resistance against the paper
Press FINISHED
Note that you will see the offset progress and completion on the touchscreen.
Loading filament
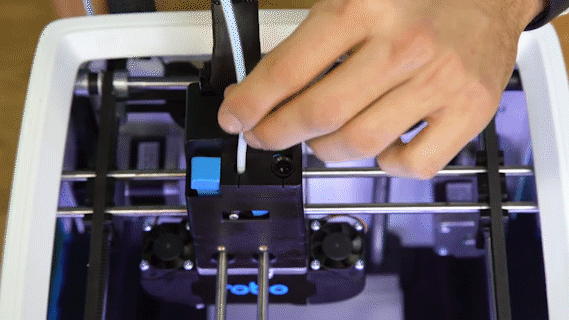
To begin loading filament, hang your filament spool on the spool holder. Be sure to unroll at least 11”— or 30 centimeters — of filament and thread it through the base of the filament sensor block and into the filament feed tube.
Continue feeding the filament through the filament feed tube until it reaches the extruder. Then, press the extruder lever arm down and feed the filament into the printer’s gears.
Now select UTILITIES on the touch screen.
Then select WIZARDS from the list.
Finally, select FILAMENT LOADING WIZARD.
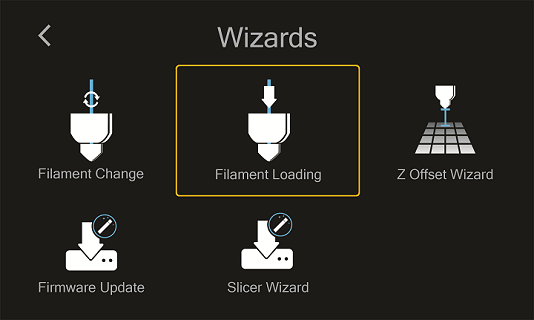
Follow the on-screen prompts:
- Heating up the printer
- Ensuring you’ve cut off the tip of the filament
- Now, look for filament to exit the nozzle

- Press NEXT, and
- Press FINISHED
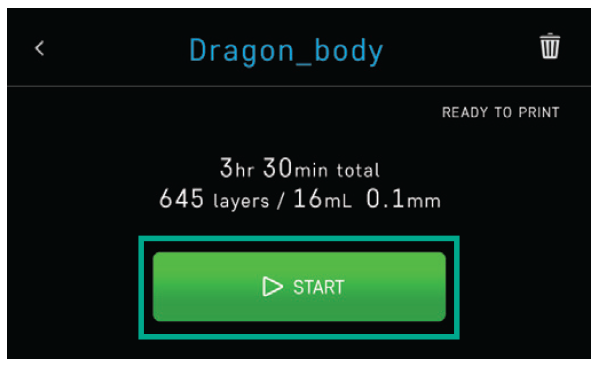
The test print
To create your first test print, select FILES on the home screen. Then select a file to print from the list.
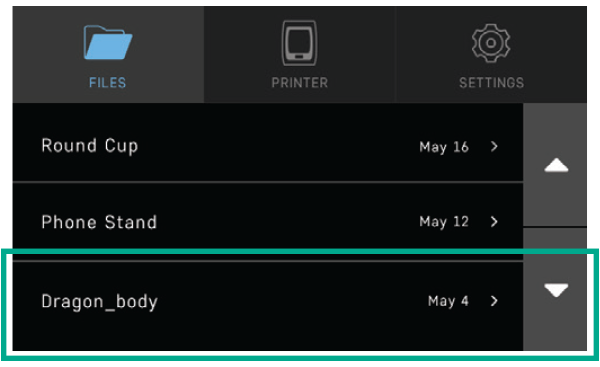
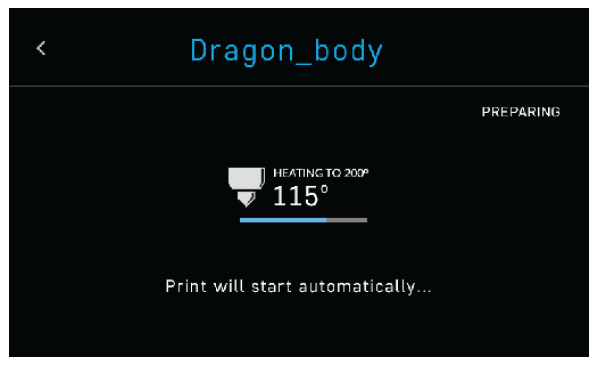
Now, select START to print—and be sure to wait several seconds while Robo C2 prepares to print the file.
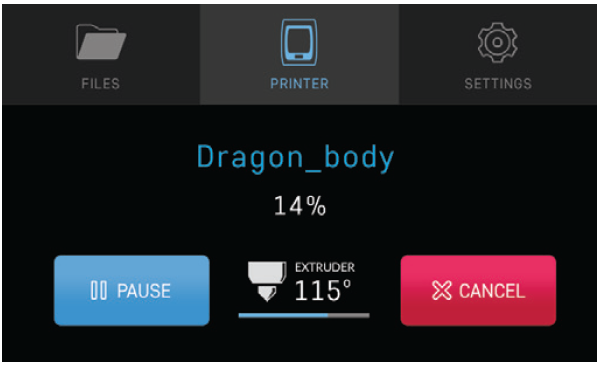
The file will start printing.
Just note that you can select PAUSE to pause your print, or you can select CANCEL to cancel your print.
Removing the test print
When the test print is complete and cooled down, remove the print bed with the finished print still in place by lifting the bed up and away from the magnets. Slowly slide the print bed out of the machine with both hands. Now, carefully flex the print bed from several positions to help loosen the print from the print bed. Repeat this process until the most of the print is loose from the bed. Carefully remove the print from the print bed with your hand.
Note that if the print is not coming loose after flexing the print bed, put the bed back in Robo C2 and use the provided spatula to carefully remove the print at its borders. Then slowly work your way underneath the print until it’s loose. Don’t force the print loose by pulling it up directly up from the print bed, since this may cause your print to break.
Using Hotspot Mode
Your printer is capable of starting If no Wi-Fi signals are available for connection, you can use Hotspot Mode to emit a Wi-Fi signal from Robo C2 in order to connect to it wirelessly from your smart device. To access Hotspot Mode, do the following:
- Select “Utilities” on the home screen of the Robo C2 touch screen
- Select “Network” from the list
- Select “Start Hotspot Mode” from the list